Step-by-Step Guide to Launch Your Ecommerce Store on Shopify
A beginner's guide to going from zero to your first online sale in less than an hour.
Starting an online business is an exciting step, but it can feel overwhelming if you’re not a tech expert. The good news is, you don’t need to be. This guide is designed to show any beginner exactly how to create a shopify store, one simple step at a time.
Think of Shopify as your all-in-one toolbox for building an online store. Instead of needing to hire a web developer or understand complex coding, Shopify gives you easy-to-use tools to handle everything. This includes adding your products, designing how your store looks, accepting payments from customers, and managing orders.
We start at the very beginning: signing up for a free trial so you can explore the platform without any risk. You’ll learn how to add your first products, write descriptions that attract buyers, and upload great photos. We then guide you through choosing a design for your store from Shopify’s collection of professional themes. You can customize the look and feel with just a few clicks to match your brand.
Next, we cover the essential “behind-the-scenes” setup that makes your store functional. This includes setting up secure payment options so you can get paid, configuring your shipping rates, and creating the important legal pages that customers look for, like a return policy. Finally, we’ll show you how to take your store live by removing the password protection.
By the end of this guide, you will have a fully functional online store ready to accept orders. The goal is to demystify the process and empower you to take that first step. So, if you’re ready to turn your business idea into a reality, let’s begin learning how to create a shopify store
Before You Start
Video Tutorial
Step-by-Step Instructions
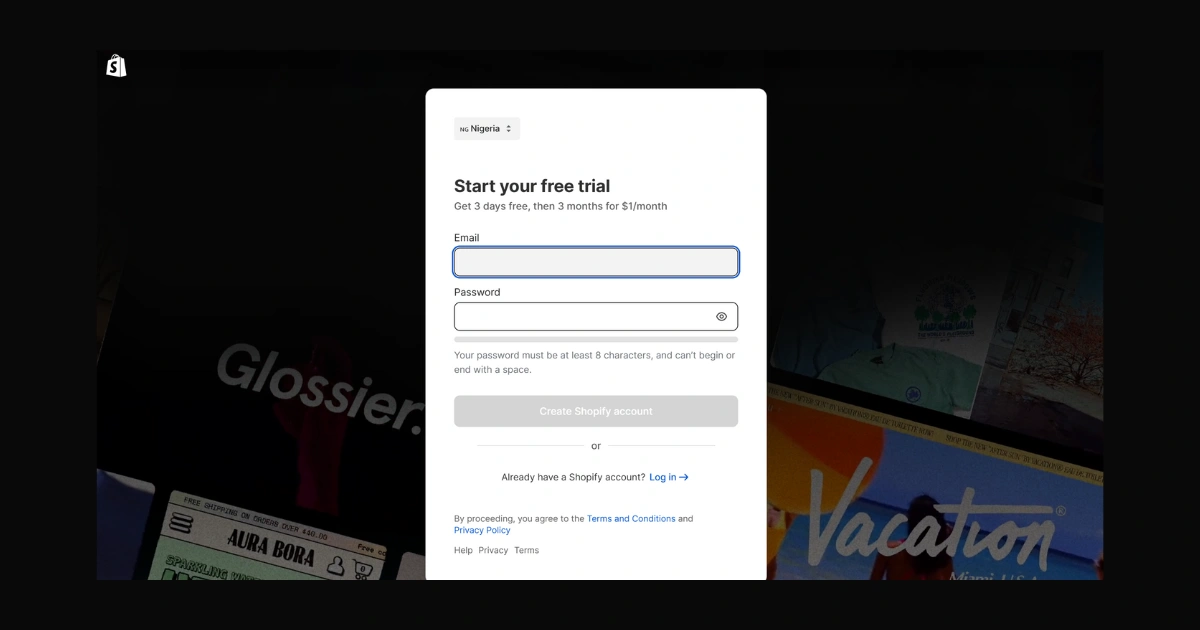
Sign Up for Your Shopify Free Trial:
Go to the Shopify website and click “Start free trial.” Enter your email address, create a password, and answer a few simple questions about your business. You won’t be charged for the trial period on how to launch your ecommerce store using Shopify.
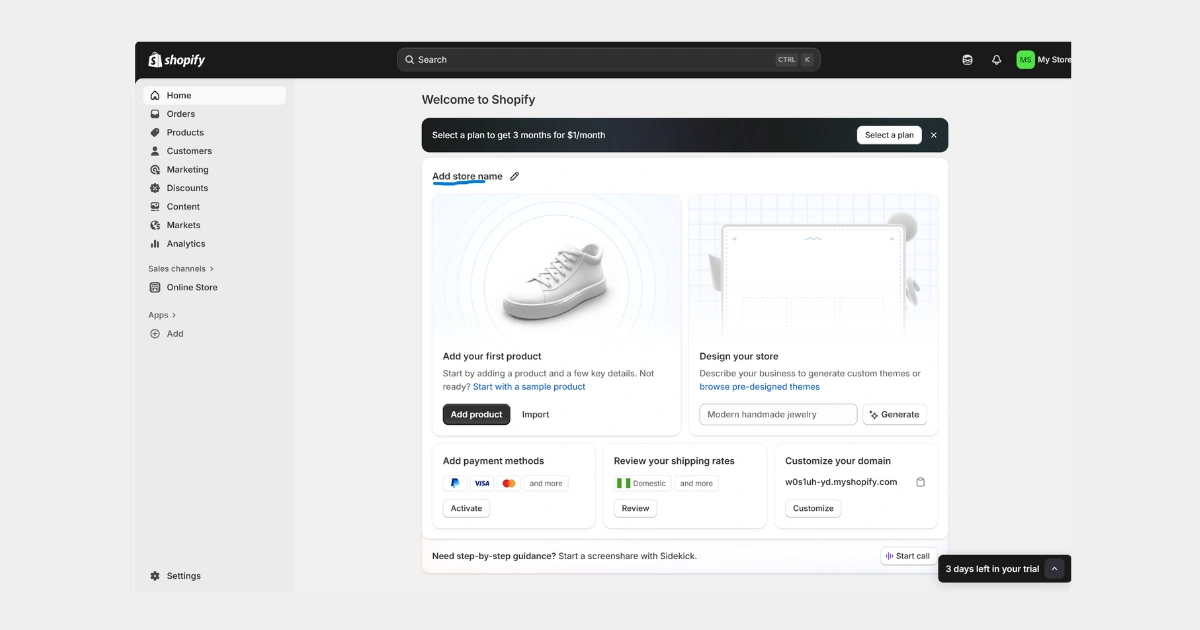
Name Your Store and Set Your Domain
Shopify will prompt you to name your store, Add your product.
This creates a temporary URL like your-store-name.myshopify.com. You can also buy a custom domain (e.g., yourstore.com) directly through Shopify later.
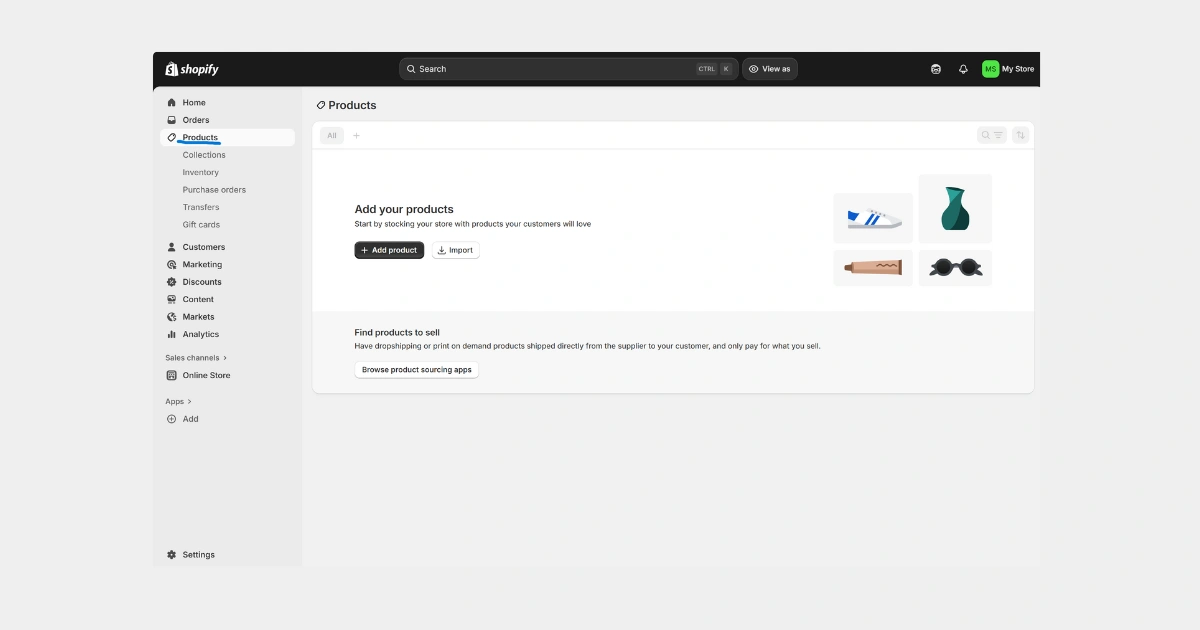
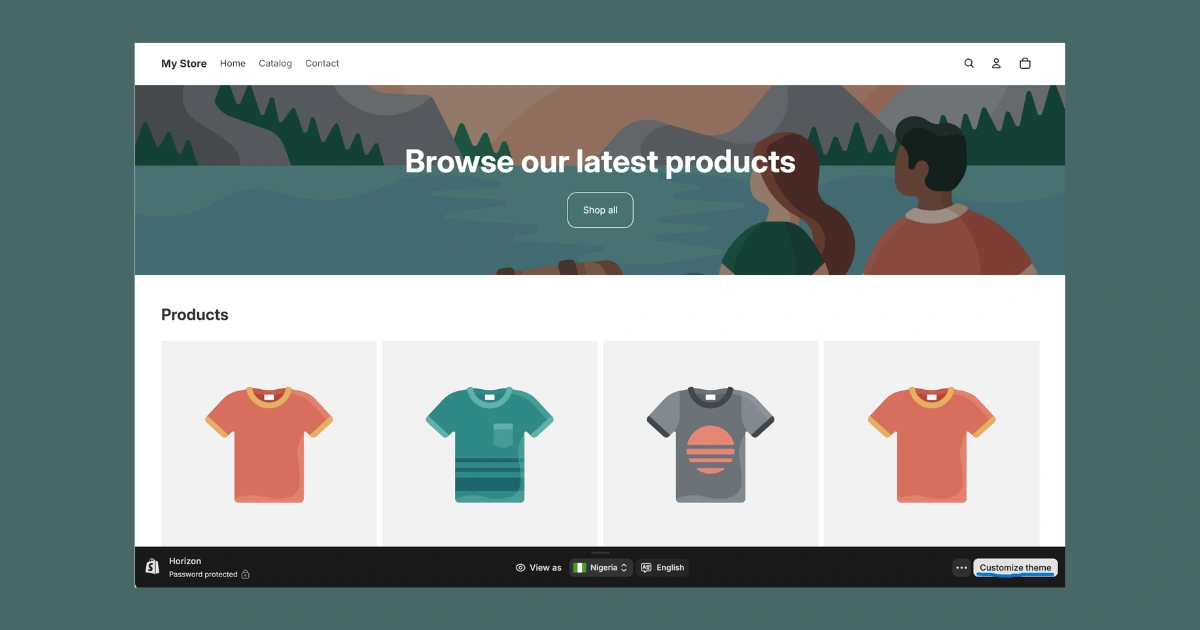
Add Your First Product
From your Shopify admin, click “Products” > “Add product.” Fill in the title, description, price, and upload your product images. This is the most important step!
Customize Your Store's Theme
Go to “Online Store” > “Themes.” Shopify has free themes to choose from. Click “Customize” to change colors, fonts, and layout using a simple drag-and-drop editor.
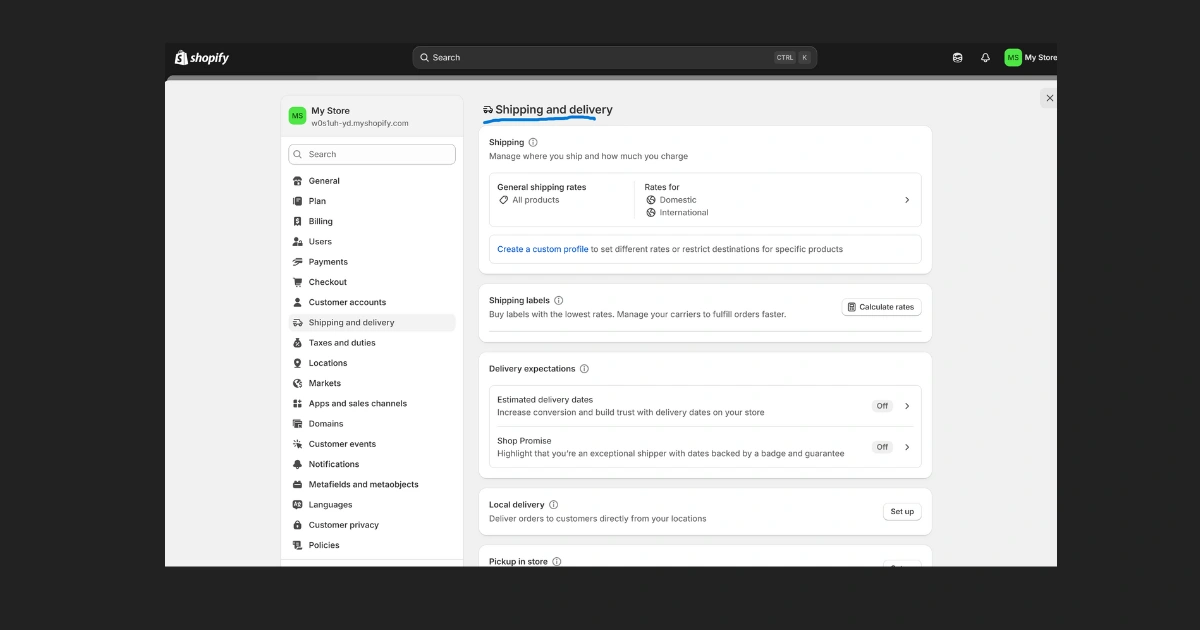
Set Up Your Shipping and Delivery Settings
Go to “Settings” > “Shipping and delivery.” Here you can set up shipping zones (where you’ll ship to) and rates (how much you’ll charge).
You can start with simple, flat-rate shipping.
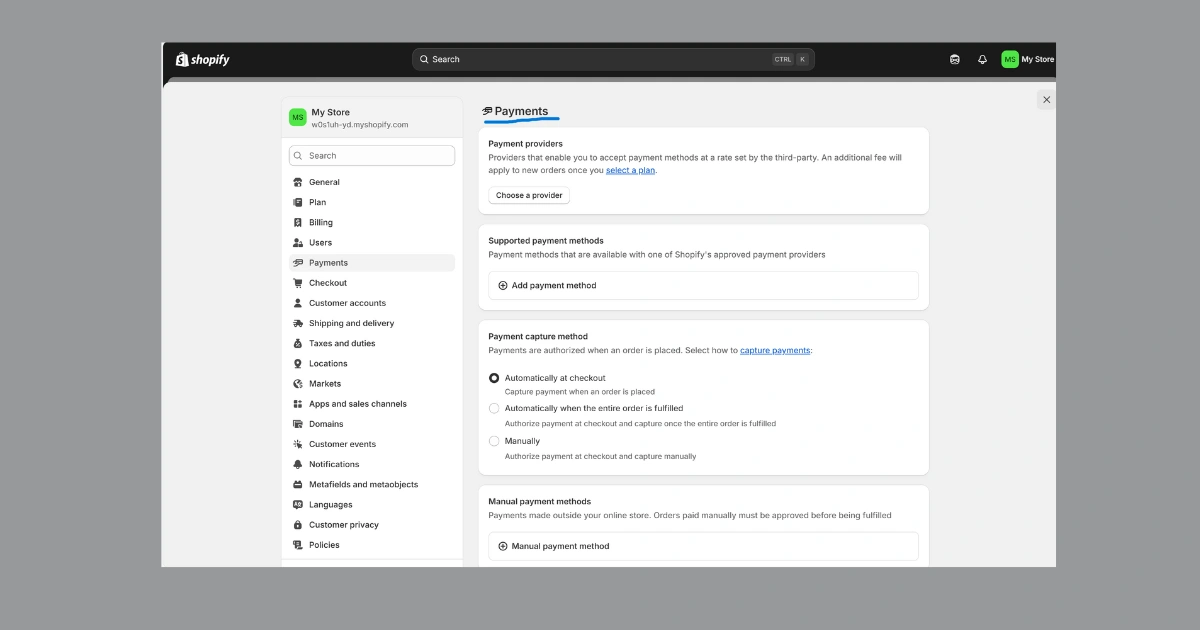
Configure Your Payment Gateway
Go to “Settings” > “Payments.”
Activate Shopify Payments (the easiest option) to accept credit cards.
You can also activate PayPal to give customers more choices.
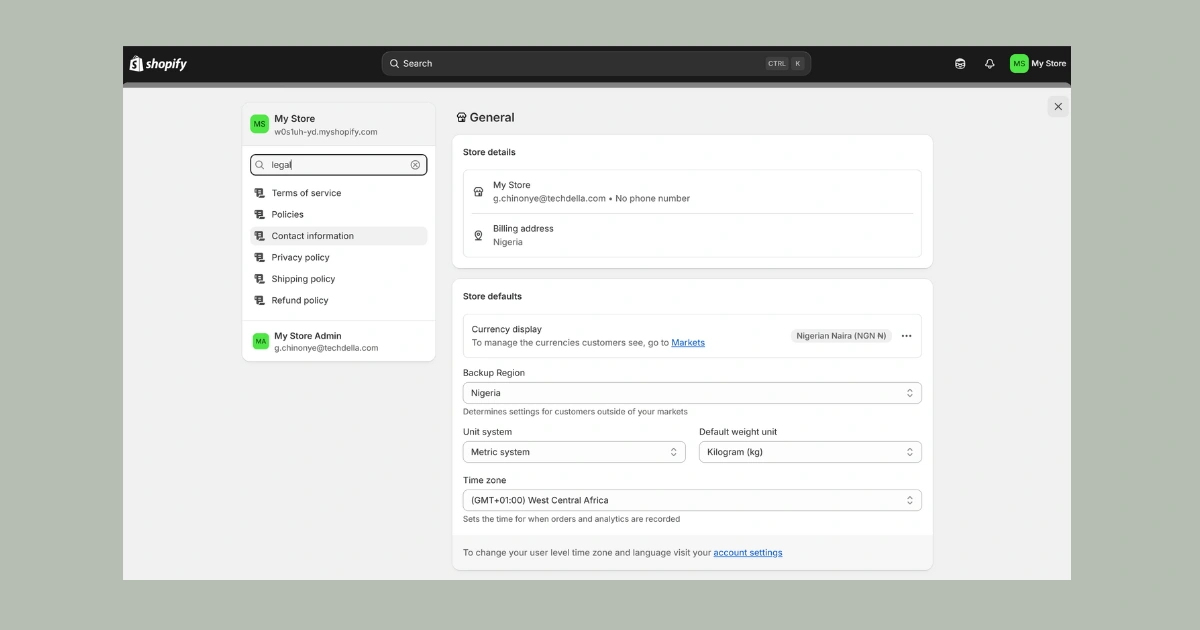
Review Your Store's Legal Pages (Policies)
Go to “Settings” Type “Legal.” Shopify can generate default Refund, Privacy, and Terms of Service policies for you. Review and customize them to fit your business.
Launch Your Store
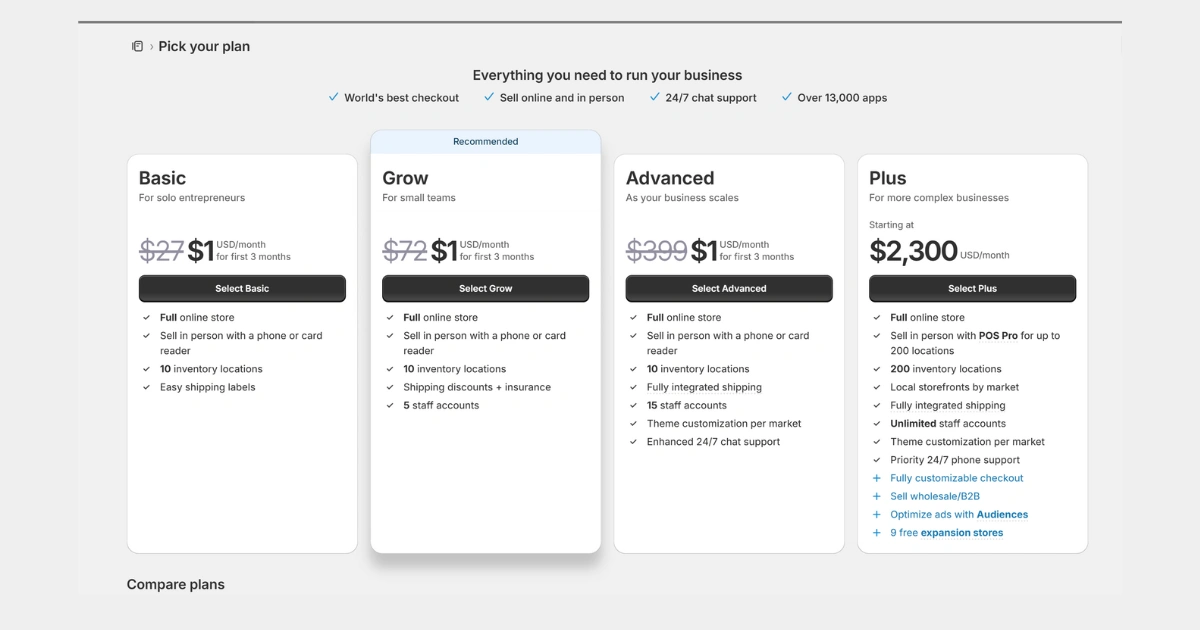
Before launching, go to “Settings” Type “Plan” Click on it and choose a paid plan to start your subscription. Then, go to “Sales channels” > “Online Store” and click “Disable password.”
Your store is now live for the world to see